A fence is a great way to establish property lines, keep pets and children in your yard, and deter predators. The installation process requires careful planning and execution.
Before starting your project, complete a property survey by a certified professional like Fence Installation Charlotte NC.
A fence adds beauty and privacy to a home and provides safety for children and pets. It also helps reduce energy costs by keeping heat and cold from escaping through open windows or the yard. Fences can also increase property value by providing a secure environment that attracts potential buyers. Many materials can be used to build a wall, including vinyl, wood, aluminum, and wrought iron. Each type of material offers a unique balance of security, cost, and aesthetics.
Before you begin building a fence, it is important to gather the proper materials. You will need post caps, which protect the tops of posts from water and other weather elements. You will also need a tape measure to determine your fence lines and ensure all posts are evenly spaced. Finally, you will need a level to ensure all posts are plumb (i.e., straight).
Other tools that are necessary for fence installation include a post hole digger and ready-mix concrete. The hole needs to be deep enough to support the posts when they are filled with concrete. It should be about one-third to one-half of the height of the fence post. Depending on the soil, it may need to be deeper. If you are unsure how deep to dig, call 811 before digging and have someone come out and locate buried utility lines.
A hammer and wrench are also helpful for fence installation. A power drill is useful for driving screws into the posts. Using a cordless drill will make the job much easier and faster. It will also help you save your hands from getting too tired.
Another tool that is helpful when installing a fence is a Mason’s line or string line. This is a thin, twisted rope that you will tie to your stakes in the ground to map out where your fence lines will go. It is important to take your time when marking out the locations of your fence and to ensure that each post is properly spaced.
In addition to the aforementioned tools, you will need wood sealer or stain to protect your new fence from the elements and keep it looking nice. It is also a good idea to buy pressure treated wood, which will stand up better against rot and termites than untreated lumber.
Preparation
The first step in a fence installation is to prepare the site for construction. This can include clearing the installation area of debris, plants and anything else that may hinder or interfere with the building process. The more space there is to work, the easier it will be for both you and your professional fence contractor.
As a homeowner, you should also check with your local municipality to see what permits and regulations will be necessary for your fence project. This will help you avoid issues like encroaching on other people’s property and ensure that your fence meets all community requirements. You can also contact your neighbors to discuss the project and see if there are any concerns or problems you should be aware of.
Once the permit and excavation are completed, you can start to think about the type of fence that will suit your needs and property. Having an idea of what you want can make the whole process much easier for both you and your contractor, especially if you opt for pre-assembled panels rather than individual pickets.
When choosing your materials, it is worth spending a bit more money to get treated wood planks. These will be less likely to warp as they dry and will help keep your fence looking nice for longer.
You should also choose your fence posts carefully, depending on the height and location of your home. For example, if you are installing a privacy fence in your backyard, you might want to consider installing taller, more imposing posts. A fence that is meant to protect a garden or pool from livestock, on the other hand, can benefit from shorter posts.
If you are unsure where your property lines are located, it is a good idea to find the property pins and mark them clearly. This will ensure that your fence does not encroach on someone else’s land and may also prevent disputes over ownership.
You should also check with your utility companies to see if any underground lines are in the vicinity of the fence line. If they are, it is important that you locate them and have any issues with them resolved before beginning the construction process. Some contractors will clear these lines for you, but it is a good idea to ask if this service is included before you agree to a contract with a fencing company.
Digging Post Holes
When installing a fence, one of the most important factors in its strength and longevity is the depth of the post hole. A post that is buried deeper is much more difficult to push over and can withstand greater amounts of pressure from winds. While it is possible for a do-it-yourselfer to dig their own post holes with handheld diggers, it can be time consuming and requires precision. It also involves a lot of bending and lifting, which can be strenuous for someone not in peak physical condition or prone to back pain. A professional installer has access to equipment that makes digging post holes quicker and more accurate.
A basic shovel and a post-hole digger are essential tools for any fencing project. In addition to these you will need to invest in a power auger or rent one to speed up the process. The right size of auger depends on the overall length of the fence and soil conditions. In rocky or sandy soils, a digging bar may be helpful to loosen the earth.
Before you begin digging, it is recommended to call your local utilities company and have any underground lines marked. This will prevent you from accidentally digging into any pipes or cables and save you a costly headache later on.
Once you have your posts sank to the proper depth, they can be set in concrete or gravel. For the former, you will need to mix dry concrete in the hole. A concrete footing should be poured around the post and tamped down to ensure that it is level. For the latter, you will need to add and tamp a layer of gravel or dirt in order to secure the post.
The general rule of thumb is to bury posts about a third of their height in the ground. This will ensure that they are strong enough to support the weight of the fence. In areas where wind is a concern, it is recommended to bury the posts more deeply, which can be done by adding more concrete or rocks.
Installing the Fence
A successful fence installation is dependent on many factors. The type of fence material, length of the project and terrain are important considerations for DIYers to consider. In addition, local communities may have restrictions on fence height and design and may require a building permit. While a DIY fence can be a fun and rewarding project, if you encounter unforeseen challenges it may be best to hire a professional to ensure the job is done correctly.
Before digging holes for your fence, stretch a taut masonry guide string along the planned fence line. This is the reference for locating and setting post locations, as well as ensuring all posts are set plumb. When relocating stakes, be careful not to disturb the string line as a sagging string will lead to inaccurate post settings. The guide string is particularly helpful in establishing the position of corner and end posts.
Dig holes for each post with a post hole digger or power auger. These holes should be about one-third to one-half of the total height of the post. Depending on soil types, the holes may need to be deeper than this to provide adequate support. When the holes are dug, be sure to add a layer of gravel to the bottom of each hole. This helps to direct rain and snow melt away from the posts, preventing them from becoming saturated with moisture and rotting. A pea-sized landscaping gravel is a good option for this purpose.
While the posts are being set, it is also a good time to clean up the work site and protect any valuable items that may be in the vicinity of the construction area. It is also a good opportunity to remove any landscape plants that are in the way of the fence line and grind down tree stumps and roots.
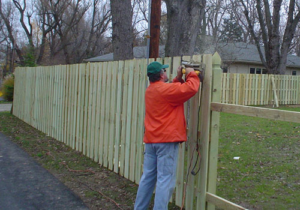
After the posts are set, you can begin installing fence panels or pickets. To ensure that all panels are installed properly, it is a good idea to have two people working together: one person can sight posts and adjust their heights to account for gradual slopes in the land while the other checks the posts for plumb and grade.